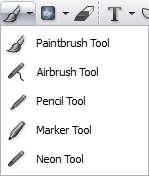
There are five painting and drawing instruments available from the Toolbar. After you select a painting and drawing instrument, you will see a number of options listed in the Properties bar. These options give you control over the width and shape of the brush or nib, the spacing and opacity of strokes, and more.
The Pencil is one of the five painting and drawing instruments, but it has no options. You can, however, change the pencil color.
To Change the Width of a Brush or Nib:
To Change the Brush or Nib Shape:
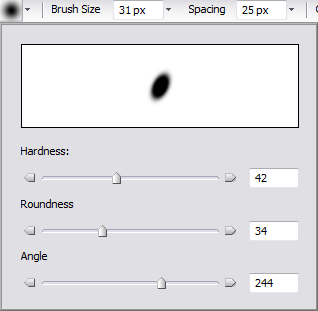
To Change the Spacing and Opacity of Strokes:
To Create the Impression That a Stroke is Shrinking and Fading:
To Change the Blend Mode:
Select a blend mode to control how pixels are affected by the painting tool.
|
Normal |
Select Normal to display the transparent object over the underlying object or photo without blending the colors together. |
|
Dissolve |
Select Dissolve to randomly replace pixels with the base color, depending on opacity. |
|
Multiply |
Select Multiply to multiply the colors in the transparent object with the colors in the underlying object or photo. The blend area is usually darker than the original object or photo. |
|
Screen |
Select Screen to multiply the inverse or opposite of the colors in the transparent object and the underlying object or photo. The blend area is usually lighter than the original object or photo. When the transparent object is over a black area, the colors in the object remain unchanged. When the transparent object is over a white area, the colors in the object become white as well. |
|
Overlay |
Select Overlay to mix the colors in the transparent object with the colors in the underlying object or photo. The blended area maintains the brightness of the underlying object or photo, and as a result you can see shadows and highlights in the blended area. |
|
Soft Light |
The Soft Light blend option will darken or burn the colors in the underlying object or photo if the transparent object above is darker than 50% gray. It will lighten or dodge the colors in the underlying object or photo if the transparent object above it is lighter than 50% gray. |
|
Hard Light |
The Hard Light blend option will darken or multiply the colors in the underlying object or photo if the transparent object above is darker than 50% gray. It will lighten or screen the colors in the underlying object or photo if the transparent object above it is lighter than 50% gray. |
|
Darken |
The Darken blend option identifies the darkest color in the blend area and leaves the darker colors unchanged, but replaces the colors that are lighter. |
|
Lighten |
The Lighten blend option identifies the lightest color in the blend area and replaces the colors that are darker, leaving the lighter colors unchanged. |
|
Difference |
The Difference blend option identifies the lightest color in the blend area. If the color in the transparent object is lighter, that color is subtracted from the color of the underlying object or photo. If the color in the underlying object or photo is lighter, that color is subtracted from the color of the transparent object. When the transparent object is over a black area, the colors in the object remain unchanged. When the transparent object is over a white area, the colors in the object are inverted. |
|
Hue |
The Hue blend option creates a color by mixing the saturation and luminance of the base color with the blend color. |
|
Saturation |
The Saturation blend option changes the saturation of the area painted to match the saturation of the applied color, without changing the hue or luminance values. |
|
Color |
The Color blend option changes the hue and saturation of the painted area to the hue and saturation of the applied color, without affecting the shadow, highlights, or midtones of the original image. |
|
Luminosity |
The Luminosity blend option changes the lightness of the underlying color to the lightness of the applied color, without affecting the hue or saturation of the image. |
To Change the Pressure of the Airbrush:
Changing pressure changes the amount of ink projected onto the work area. When you reduce pressure, less ink is sprayed onto the work area and when you increase pressure, more ink is sprayed onto the work area.
To Change the Neon Glow:
The glow is created by adding an outline around the stroke. The glow is diminished by reducing the width of the outline around the stroke. The glow is increased by increasing the width of the outline around the stroke.
 to select the glow color. Click the foreground box to select the
stroke color. Click the background box to select the outline or glow color.
to select the glow color. Click the foreground box to select the
stroke color. Click the background box to select the outline or glow color.