Layer masks allow you to control a layer's level of transparency. While it is easy to control the opacity of a layer globally using the Opacity slider, layer masks are useful when you want to target a particular part of a layer. Use layer masks to hide or reveal portions of the layer beneath. Layer masks are effective for combining multiple images into a single image or for making localized adjustments.
The easiest way to understand layer masks may be to think of them in the following ways:
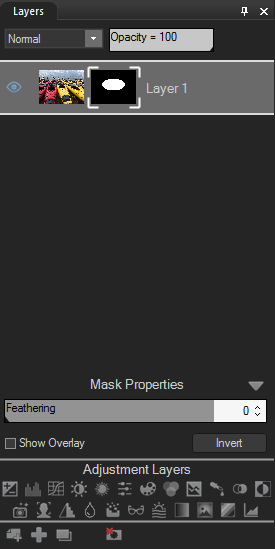
A white layer mask completely covers the layer below it. As you paint on the white layer mask with a black brush, you are brushing "holes" through the mask, allowing you to see through to the layer below. Conversely, a black layer mask is transparent and completely displays the layer below it. As you paint on the black layer mask with a white brush, you are masking the image, covering the layer below.
To Create a Layer Mask:
Do one of the following:
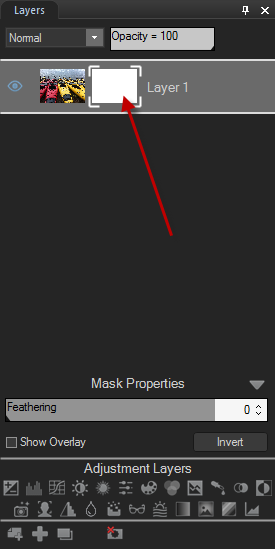
The layer mask will appear as a white or black box in the Layers pane next to the thumbnail of the image on the layer you selected. To perform actions to the layer mask, you must select it in the Layers pane. You can alter the opacity of the layer mask by dragging the Opacity slider at the top of the Layers pane. You can apply any Edit mode adjustment to the layer mask by selecting it and entering the tool.
|
Selected white layer mask |
|
|
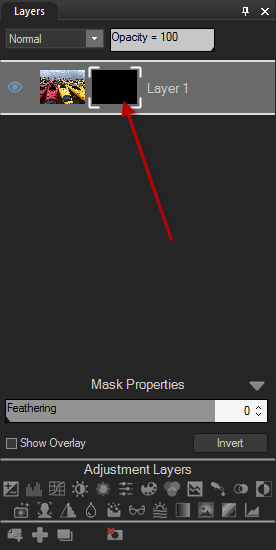
Selected black layer mask |
|
You can adjust the properties of each layer mask on each layer individually using the Mask Properties panel. The adjustments you make are non-destructive, meaning that you can adjust them at any time throughout the editing process.
To Access the Mask Properties Panel:
Select the mask in the Layers pane. The Mask Properties will appear at the bottom of the pane, above Adjustment Layers.
You can make the following adjustments to your layer mask:
|
Feathering |
You can non-destructively feather your mask to avoid sharp edges or a stark contrast between the mask and the layer. Move the slider to blur the edges of the mask. |
|
Invert |
You can non-destructively invert your mask. This will turn a white mask black, and a black mask white. |
Displaying a Mask Overlay:
You can make your mask easier to see by enabling the Show Overlay checkbox in the Mask Properties panel.
To Customize the Mask Overlay:
|
Mask Highlighted |
This option highlights your mask in the color of your choosing. Select a color from the drop-down menu. You can customize the transparency of the mask overlay by using the Opacity slider. |
|
Mask Exposed |
This option highlights the non-masked areas of your layer in the color of your choosing. Select a color from the drop-down menu. You can customize the transparency of the unmasked area by using the Opacity slider. |
The mask overlay is only visible when the layer is selected.
To Edit a Layer Mask:
Select the layer mask in the Layers pane, then choose any adjustment, or drawing or selection tool.
You can create or modify selections from masks.
To Create a Layer Mask from a Selection:
You can make a layer mask from a selection.
Or:
To Add a Mask to a Selection:
To Subtract a Mask from a Selection:
To Select the Area Common to the Mask and the Selection:
To Delete Selected Mask Pixels:
See Using Selections.
You can create masks from specific targeted colors and/or tones—and even skin tones.
To Create a Layer Mask by Targeting Colors or Tones:
The Pixel Targeting Panel
The Pixel Targeting panel consists of four sections: Targeted Tones, Targeted Colors, Skin Targeting, and the Target Mask.
Target Mask:
The Target Mask allows you to see the areas in the image that are targeted by displaying them in white. When no pixels are targeted, the Target Mask will appear completely black. Conversely, when all pixels are targeted, as is the case before any sliders have been altered on the Pixel Targeting panel, the entire Target Mask will appear completely white.
Targeted Tones:
The Targeted Tones sliders allow you to target tones of brightness for the mask. To target one or more tones, you may find it easiest to press the Min button under the Targeted Tones section. This deselects all tones, and you can then select specific tones to target for the mask by moving their sliders up between 0 and 100, depending on your desired intensity.
Targeted Colors:
The Targeted Colors sliders allow you to target specific colors for the mask. To target one or more colors, you may find it easiest to press the Min button under the Targeted Colors section. This deselects all colors, and you can then select specific colors to target for the mask by moving their sliders up between 0 and 100, depending on your desired intensity.
Skin Targeting:
The Target Skin slider allows you to specifically target skin tones for the mask. To target skin tones, move the slider to the right between 0 and 100, depending on your desired intensity.
When you move the Skin Targeting slider, all other colors (except for skin tones), are excluded. You cannot then alter the green color slider, for instance.
To exclude skin tones from your mask, move the slider to the left between 0 and -100.