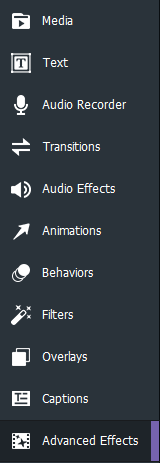
Advanced Effects
The tools in the Advanced Effects tab are used to fine-tune and further customize media assets.
Chroma Key
Chroma Key removes a solid color from the background, most often used on videos shot with a green screen.
To remove a color from a media asset:
- With clips added to the Timeline, select the Advanced Effects tab, or press E.
- Select Chroma Key and drag it onto a clip residing on the Timeline. A note stating "Effect Added" will temporarily appear on the Timeline.
- With the clip selected, in the Chroma Key section of the Properties pane, adjust the settings as described below.
Chroma Key Options
|
Color |
Use the Colors pop-up to select the precise color to remove from the media asset. To open the Colors pop-up, make a selection from the Color drop down menu. Use the far right vertical color slider to navigate to a color group. The selected color displays its numerical values in the Red, Green, and Blue fields, as well as the Hex field. Enter precise values to get specific colors, or use the Color Dropper tool to pick specific colors from the media asset. |
|
Tolerance |
Adjust the slider to define how similar a color must be to the selected color in order to be removed. |
|
Softness |
Adjust the slider to soften the edge between the color being removed and what is left. Softness also reduces the overall opacity of the image. |
|
Invert Settings |
Enable the Invert Settings checkbox to remove every color except the selected color. |

Color LUTs
"Color LUT" stands for Color Lookup Table. Color LUTs are lists that instruct (Undefined variable: MyVariables.Video Editor Short) to map specific RGB values to other specific color values. Iimport LUTs and use them as filters in (Undefined variable: MyVariables.Video Editor Short). Color LUT supported file types are .3dl and .cube.
To apply a Color LUT to a media asset:
- With clips added to the Timeline, select the Advanced Effects tab, or press E.
- Select Color LUTs and drag it onto your clip on the Timeline. A note stating "Effect Added" will temporarily appear on the Timeline.
- With the clip selected, in the Color LUTs section of the Properties pane, do one of the following:
- Select a LUT from the Color LUTs drop-down menu in the Properties pane.
- Click the Import LUTs button. In the Open dialog, browse to the location of the LUT files, and click the Open button. The LUT is immediately applied.
- Optionally, use the slider to adjust the opacity of the Colour LUT.

To remove Color LUTs from the Color LUTs drop-down menu:
In order to remove a Color LUT from the list of available LUTs, a LUT must first be applied.
- In the Color LUTs section of the Properties pane, select the LUT to be removed from the list.
- Click Remove.
- Click Yes to confirm.
Clip Speed
The Clip Speed effect controls the speed and overall duration of media assets.
To speed up or slow down a media asset:
- With clips added to the Timeline, select the Advanced Effects tab, or press E.
- Select Clip Speed and drag it onto your clip on the Timeline or select the clip and press Alt + C. A note stating "Effect Added" will temporarily appear on the Timeline.
- With the clip selected, in the Clip Speed section of the Properties pane, configure the settings as described below.
|
Speed |
Decrease a clip's speed by reducing the value below 1.00. Increase a clip's speed by increasing the value above 1.00. |
|
Minutes/Seconds |
Set a clip's desired duration using minutes or seconds. |
|
Frames |
Use the Frames field to fine-tune the speed and duration of media assets. |
Audio Speed
Use the Clip Speed effect to control the speed and overall duration of audio only.
To speed up or slow down an audio track:
- Right-click a clip on the Timeline and select Separate Audio and Video from the context menu, or press Alt + S.
- Select the Advanced Effects tab, or press E.
- Select Clip Speed and drag it onto your audio clip on the Timeline, or select the clip and press Alt + C.
- With the audio clip selected, in the Clip Speed section of the Properties pane, configure the settings described in the Clip Speed Options.
Mosaic
Blur out specific areas of your media for covering sensitive information, or providing anonymity to individuals in a media asset.
To add a mosaic effect to a media asset:
- With clips added to the Timeline, select the Advanced Effects tab, or press E.
- Select Mosaic and drag it onto a track on the Timeline.
- With Mosaic selected, in the Mosaic section of the Properties pane, configure the settings as described below.
Mosaic Options
|
Blend Mode |
Controls how the Mosaic effect impacts the final image when the opacity is changed. |
|
Opacity |
The Opacity slider changes the opacity of the Mosaic effect, providing control over how distinct the Mosaic effect appears in the media. Finally, use a blend mode to customize the Mosaic effect further. |
|
Rotation |
Enter a value in the field or drag the arrow handles to rotate the Mosaic effect by the X, Y, or Z axes. |
|
Degree |
You can use the Degree slider to control how blurred the Mosaic effect is. |
Color Pass
Color Pass is used to isolate certain colors within a media asset and revert all others to black and white. Color Pass helps draw the eye to a certain part of a clip, for example, the pink cherry blossoms on a tree. The cherry blossom flowers will show up as pink, and the rest of the image would be black and white.
To add Color Pass:
- With clips added to the Timeline, select the Advanced Effects tab, or press E.
- Select Color Pass and drag it onto a clip on the Timeline. A note stating "Effect Added" will temporarily appear on the Timeline.
- With the clip selected, in the Color Pass section of the Properties pane, adjust the settings as described below.
Color Options
|
Color |
Use the Colors pop-up to select precise colors to focus on or invert within a media asset. The far right vertical color slider navigates to a color group. The selected color displays its numerical values in the Red, Green, and Blue fields, as well as the Hex field. Enter precise values to get specific colors, or use the Color Dropper tool to pick specific colors from the media asset. |
|
Similarity |
Adjust the slider to define how similar a color must be to the selected color in order to be affected. |
|
Invert Settings |
Enable the Invert Settings checkbox to remove a selected color and leave every other color. |
Replace Color
The Replace Color effect is used to select certain colors within a media asset and replace the selected colors with a different color.
To add the Replace Color effect to a media asset:
- With clips added to the Timeline, select the Advanced Effects tab, or press E.
- Select Replace Color and drag it onto a clip on the Timeline.
- With the clip selected, in the Replace Color section of the Properties pane, configure the settings as described below.
Replace Color Options
|
Target Color |
Use the Colors pop-up to select precise colors to replace. The far right vertical color slider navigates to a color group. The selected color displays its numerical values in the Red, Green, and Blue fields, as well as the Hex field. Enter precise values to get specific colors, or use the Color Dropper tool to pick specific colors for your media. |
|
Replace Color |
As above, choose a color to replace a target color with. |
|
Similarity |
Adjust the slider to define how similar a color must be to be the selected color in order to be affected. |
|
Solid Colors |
Enable this box to change the Target Colors to the Replace Color and remove any light/dark shadows. When this box is disabled, the target color will be replaced, but the light/dark image variations will remain. |