Recordings
Luxea Video Recorder is used to record webcam, microphone, system audio, and screen. The recorded clips can then be added to a project's Timeline.
To launch Luxea Video Recorder from within Luxea:
To launch Luxea Video Recorder from within Luxea, do one of the following:
- Click the Record button in the top left corner of ACDSee Luxea Video Editor.

- Press Ctrl + R.

To launch Luxea Video Recorder as a standalone app:
To launch Luxea Video Recorder as a standalone app, do the following:
- Access the Windows Start menu and select Luxea Video Recorder from the ACD Systems folder.
When using the Luxea Video Recorder as a standalone app, to have the Luxea Video Editor automatically open after a recording, select Tools | Options from the Recorder main menu, and under the General Settings tab, enable the Start Luxea Video Editor after recording checkbox.
Recorder Options
To set the recorder window options:
- Select the drop-down menu next to the Dimension section.
- Select the recording area dimensions.
- Optional: When using a dimension other than "Full Screen", drag the marquee handles to adjust the recording area to the desired dimensions.

- Optional: Select "Custom Dimension" from the drop-down and enter values for the Width and Height fields.
To record a screen:
- Ensure the Screen on icon
 is accompanied by a green check mark.
 - Configure the desired settings in the recorder window. See the Recording Options section below.
- In the top right corner, click the REC button
 , or press F9.
 - To stop recording, press F10. (To change this keyboard shortcut, see the Hotkeys section in the Recording Options table below.)
The options during recording include:
- Toggle the Pause/Resume button to start and stop the recording.
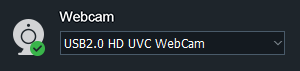
- Ensure the Webcam icon
 is accompanied by a green checkmark.
 - Select the device from the drop-down menu.
To disable webcam recording, toggle the Webcam icon's green checkmark to a red X  .
.
To record using the microphone:
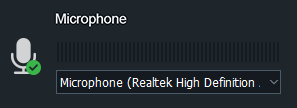
- Ensure the Microphone icon
 is accompanied by a green checkmark.
 - Select the audio input device from the drop-down menu.
To disable a microphone recording, toggle the Microphone icon's green checkmark to a red X  .
.
To record system audio:
Ensure the System Audio icon  is accompanied by a green checkmark.
When recording video or audio, Luxea records in real-time MP4.
Annotations
There are three types of annotation that can be added to a recording:
- System Time Stamp,
- Caption, and
- Watermark.
To add annotations:
- In the Recorder dialog, select Tools | Annotations from the main menu.
- Select one of the three following options:
- Add the date and time to a recording by selecting Tools | Annotations | Add System Time Stamp.
- Add a caption to a recording by selecting Tools | Annotations | Add Caption.
- Add a watermark to a recording by selecting Tools | Annotations | Add Watermark.
To set the recording options, go to Tools | Options.... In the Options dialog, configure the settings as described below.
|
General |
||||
|
General Settings |
Record |
Disable screensaver during recording |
Temporarily disables the screensaver, which is useful for longer recordings. |
|
| Start Luxea Video Editor after recording | When using the Luxea Video Recorder as a standalone app, enable the Start Luxea Video Editor after recording checkbox to have Luxea Video Editor automatically open after ending the recording secession. | |||
|
Hardware Acceleration |
Enable hardware acceleration |
Enabled by default, the Hardware Acceleration option ensures that the encoding process is undertaken by the graphics card, rather than the CPU. Hardware Acceleration quickens the media rendering process. If presented with multiple graphics cards, Luxea will prioritize hardware acceleration options using the following hierarchy: NVIDIA, Intel® Quick Sync. |
||
| Hardware Acceleration Drop-down | List of potential Hardware Acceleration options available to the current Luxea installation. | |||
| Record Duration | Stop recording after | Enable the Stop recording after checkbox to stop the recording at the time specified in the adjacent hr, min, and sec fields. | ||
|
Annotation |
Configure options for annotations. To add an annotation, navigate to Tools | Annotations |
|||
|
System Time Stamp |
System Time Stamp |
Position |
Select a square to indicate where on the screen the date and time should appear. |
|
|
Text |
|
|||
|
Preview |
Displays the date and time as it will appear in the recording. |
|||
|
Caption |
Caption |
Enter the caption's text. |
||
|
Position |
Select a square to indicate where on the screen the caption should appear. |
|||
|
Text |
|
|||
|
Preview |
Displays the caption as it will appear in the recording. |
|||
|
Prompt before recording |
After clicking the Record button, Luxea confirms the caption. |
|||
|
Watermark |
Watermark |
Browse to the file to use as a watermark. |
||
|
Position |
Select a square to indicate where on the screen the watermark should appear. |
|||
|
Opacity |
Drag the Opacity slider to specify the transparency of the watermark. |
|||
|
Recorder |
||||
|
Recorder Settings |
Video |
Maximum screen recording frame rate |
Select the screen record frame rate to determine how quickly the picture refreshes. While it is possible to limit the frame rate during capture, a higher quality cannot be achieved by setting the frame rate above the host computer's capabilities. |
|
| Screen recording video quality | Select between "Best", "Better", and "Normal" to determine a resource-appropriate video quality setting for Screen recordings. | |||
| Output | ||||
| Output Settings | Saving | Output Directory | Either manually enter the directory, or click the "..." button to select a directory. | |
| File naming setting | Text String and Drop-down | Enter a text string portion of the file name to be combined with the value selected from the drop-down list. The file name used to save output from Luxea is the combination of the text string and the value selected in the drop-down list. | ||
| Mouse | ||||
| Mouse Settings | Play mouse click sounds | Left click | Enable to play a mouse-click sound for each left-click mouse event. | |
| Right click | Enable to play a mouse-click sound for each right-click mouse event. | |||
| Mouse click effect | Add mouse click effect | Add mouse click effect | Enable to add an effect to a mouse click event. | |
| Type | Select the type of effect to apply to a mouse click. | |||
| Left click color | Select the color of the effect applied to a left-mouse click. | |||
| Right click color | Select the color of the effect applied to a right-mouse click. | |||
| Size | The slider determines the size of the mouse click effect. | |||
|
Hotkeys |
Set keyboard shortcuts for the recording process. | |||
|
Hotkey Settings |
Start/Resume/Pause |
Enable the checkboxes and/or use the drop-down menu to indicate the hotkey(s) to be used for starting, pausing, and resuming a recording. |
||
|
Save |
Enable the checkboxes and/or use the drop-down menu to indicate the hotkey(s) to be used for saving a recording. |
|||
|
Webcam |
Configure webcam recording options. |
|||
|
Webcam Settings |
Webcam |
Position |
Select a square to indicate where the webcam recording should appear on the screen recording. |
|
|
Size |
Move the slider to set the size of the webcam recording. |
|||