To Open the
In View or Edit mode, go to View |
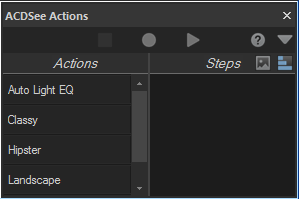
To Record Your Adjustments:

|
Off |

|
On |
 If you pressed the Stop button by accident, press Cancel to continue recording.
To Preview a Recording:

|
Preview Image |

|
Preview Steps |
To Delete a Recording:
Note that you cannot undo deleting a recording. Your deleted recording will not appear in your system's Recycle bin.
To Rename a Recording:
You can apply your recordings to other images, allowing you to batch edit using any Edit mode adjustments you have recorded.
When applied to images that are a different size than the one used in the recording, actions that involve drawings
For best results with tools from the Geometry group, apply your recordings to similarly sized images.
To Apply a Recording:
Recordings are applied in the same order they were recorded in.
Do one of the following:

You can apply a recording to a singular layer by selecting the layer in the Layered Editor and pressing the Play button in the ACDSee Actions window.
To Set the Output Options for a Recording:
You can configure the options that will determine how files are outputted when recordings are applied to them. Each output option you configure is specific to the selected (right-clicked) recording. Output options only affect recordings that are applied to images in modes other than Edit mode.
Configured output options will not travel with shared recordings.
Output Options
|
Action Results |
Overwrite the selected file, create copy in case of non-encodable files |
When a recording is applied, the file is overwritten with the edited version. If the file cannot be overwritten, such as in the case of a RAW file, a copy will be saved. |
|
Rename modified images and place in source folder |
Select this option if you want to save the edited images with a new name, in the same folder as the original images. |
|
|
Place the modified images in the following folder |
Select this option if you want to save the edited images to a specific folder. Browse to the folder. |
|
|
Overwrite existing |
Use this option to determine what ACDSee Ultimate should do if the destination folder contains an image with the same file name as one of the edited images:
|
|
|
Preserve last-modified dates |
Select this option if the original image has a last-modified date, and you want the edited image to have the same last-modified date. |
|
|
Preserve metadata |
Select this option if the original image contains metadata, and you want the edited image to contain the same metadata and color profile. |
|
|
Preserve database information |
Select this option if you want to preserve |
|
|
File Output |
File format |
Select the file format in which you would like to save the outputted images. |
|
Pixel format |
Use this option to determine number of bits per pixel (BPP) in the output images, and whether the images will be color or grayscale. Select Automatic if you want the output images to have the same pixel format (or the closest possible match) as the original images. You can use this option to convert the images from color to grayscale, or to convert the images to a pixel format that is compatible with other software or processes. |
|
|
Color space |
Select the color space checkbox to choose a color space option from the drop-down list. |
If you begin recording after adjustment layers are added, the recording can only be applied to a target image that has the same adjustment layers already added to it.
If you record adding a layer to a single layered image, and then try to apply this recording to a multi-layered target image, the layer will be added on top of all of the other layers.
If you record adjusting specific adjustment layers of a multi-layered image, the recording can only be applied to a target image with the same adjustment layer. For example, if your recording contains a sharpening adjustment layer as its third layer and you adjust it, your target image must also have a sharpening adjustment layer as its third layer.
If you record making global adjustments to a single layered image, then add layers, and then apply the recording to a multi-layered target image, the target image will be flattened. The global adjustments will be applied to the whole image, and then the layers will be added on top of that.
To Share a Recording: