- Click the Add Video Files... button.

To add a folder, select Add Folder... from the drop-down menu. - Select one or more files from the Add Video Files dialog box. Use CTRL + click to select multiple files. Press Open.
You can queue a list of files to be converted to a number of different file types to be played on a variety of devices.
You can add files to the Input Video List in preparation for conversion.
- Click the Add Video Files... button.
To add a folder, select Add Folder... from the drop-down menu.- Select one or more files from the Add Video Files dialog box. Use CTRL + click to select multiple files. Press Open.
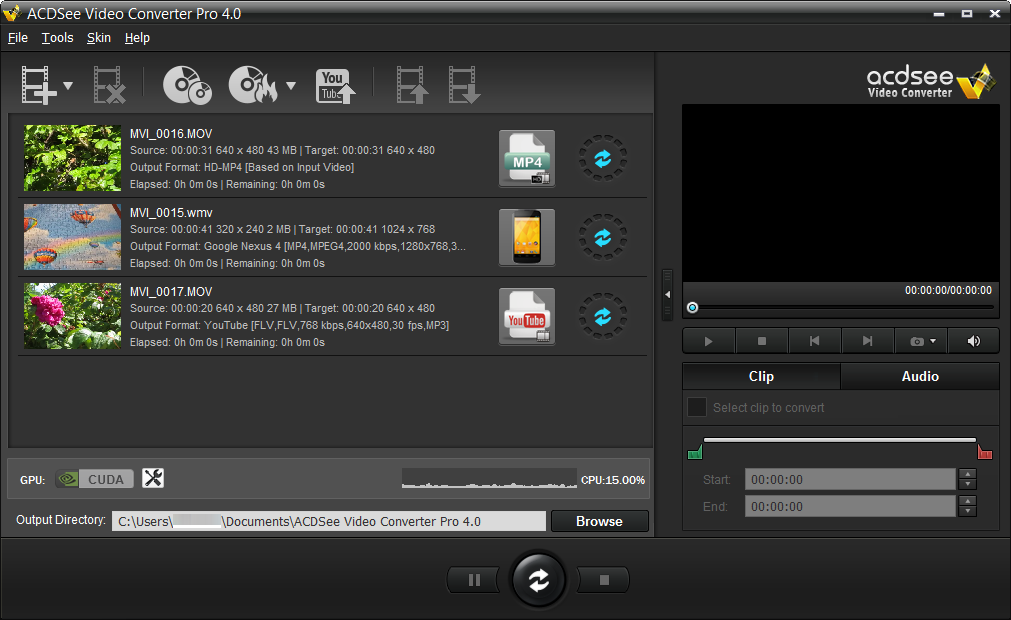
At the bottom of the window, you will see a CPU performance graphic. This reflects the current usage of your CPU and will help you decide if your CPU has the resources required for converting videos.
If you have an NVIDIA graphics card that supports CUDA, you can select it to handle your conversion, thereby freeing up your CPU for other tasks. Select to use your NVIDIA graphics card by clicking the CUDA graphic on the left side. You can also make this change on the Performance tab of the Options dialog.
Please note that if your video card does not support CUDA, this option will be disabled.
After you have added your files to the Input Video List, you can convert them to a wide variety of formats.
 Click this icon to open the Choose Format dialog box. Configure your format settings as described in the table below.
Choose Format Dialog Box
|
Output Type |
Select the output type you would like to convert your files to from the drop-down menu according to the device you would like to play your video on. |
|
|
Output Format |
Select the specific device from the drop-down menu of options available for the output type you selected. Next, select from the drop-down menu of parameters for that device. |
|
|
Format Details |
This section displays the format details of the output you have selected, including:
This section also includes the Detailed Settings button. Click the Detailed Settings button and configure the options as described in the Detailed Settings Dialog Box table below. |
|
|
Split |
Split By |
If you would like to split your video, check the Split By checkbox and select whether you would like to split your video by:
or
|
|
Apply to all |
Check this box to apply the above settings to all of the files in the Input Video List. |
Changes made within the Detailed Settings dialog can be saved as a User-Defined Profile.
Detailed Settings Dialog Box
|
Format |
||
|
Video Parameters |
Codec |
Video codec specifies the type of video data compression you would like ACDSee Video Converter to use. |
|
Size |
Select the video image size. |
|
|
Bitrate |
Select the bitrate to determine how much data will go to the screen per second on playback. A higher bitrate allows for a higher quality picture, however, it also increases the file size. |
|
|
Frame Rate |
Select the frame rate to determine how quickly the picture refreshes. |
|
|
Audio Parameters |
Codec |
Codec specifies the type of audio data compression you would like ACDSee Video Converter to use. |
|
Sample Rate |
Sampling describes the data rate of a sound recording. A higher sample rate allows for higher quality sound, however it also increases the file size. |
|
|
Channel |
From the drop-down menu, select 1 to have the same sound come out of the left and right speakers, or, 2, to have different sound come out of the left speaker versus the right. |
|
|
Bitrate |
Select the bitrate to determine how much audio data will go to the speakers per second on playback. A higher bitrate allows for a higher quality sound, however, it also increases the file size. |

Once converted, you can locate the output video by right-clicking the file and selecting Locate Output Video.
ACDSee Video Converter converts all files in the Input Video List. If you have converted a file and then add another file to convert, remove the previously converted file from the list, unless you would like to convert it to another format.