Frequency Separation
By separating images into high frequency and low frequency layers, Frequency Separation negates image imperfections while retaining detail and texture.
To Apply Frequency Separation:
- With an image selected in the Layers pane, do one of the following:
- Right-click the layer and select Frequency Separation.
- Select Layer | Frequency Separation from the main menu.
- Press Ctrl + Shift + F.
- In the Frequency Separation pane, adjust the Blur Radius slider to determine how much detail is visible in the high frequency layer, and, by contrast, to determine the blur level of the low frequency layer. Toggle the view of each layer using the High Frequency and Low Frequency radio buttons. Please note that these buttons do not impact the Blur Radius setting.
- Click Done.
It is recommended to select a setting in which the details just become visible in the high frequency layer.
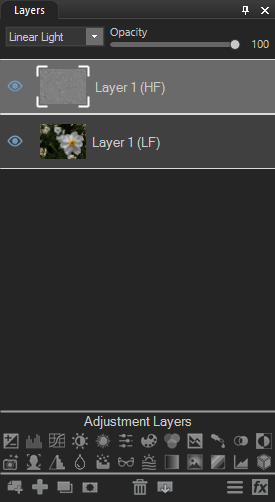
A frequency separated image is separated into two layers: High Frequency (HF) and Low Frequency (LF). The Low Frequency layer contains the tones, colors, and shadows of the image, and will appear blurry on its own. This is because the texture information is stored on the High Frequency layer.
Retouching Images
By isolating adjustments to one layer or the other, it is possible to repair flaws while maintaining a natural look.
Approach retouching with Frequency Separation in two ways:
- Low Frequency Layers, and
- High Frequency Layers.
Low Frequency Layer
Use blurring on the Low Frequency layer to smooth out lighting inconsistencies and splotchiness. With the Low Frequency layer selected, use the Detail Brush or Blur tool, or apply blurring to specific areas by using a selection tool or brush.
High Frequency Layer
Use cloning on the High Frequency Layer to even texture and correct detail-related flaws. With the High Frequency layer selected, use the Repair tool to apply cloning.
Increase sharpening by duplicating the high frequency layer one or more times.