Drawing Tools
Use the Drawing Tools to add lines and shapes, such as squares, circles, and arrows to an image. Other options include adjusting the width, feathering, and blending of your brush, which is useful for creating subtle and dramatic drawings.
To draw on an image:
-
Select a drawing tool on the Toolbar (see Toolbar and Tool Properties Bar).
-
Optional: Select from one or more of the following options (Note: Options vary depending on the tool selected):
Option
Instructions

Color
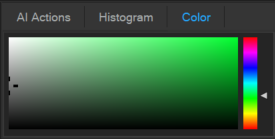
Select a color by clicking the color boxes at the top right of the panel to open the Foreground or Background Color dialog, which displays a dialog of swatches to choose from. If you are drawing a solid shape, such as a rectangle, the top (foreground) color box defines the color for the outline of the shape. The bottom (background) color box defines the color that fills the center of the shape. If you want your shape to be a solid color, set both color boxes to match.
You can reset to black and white by pressing the reset button directly next to the color boxes.
You can also access the color palette on the fly by using the Color pane at the top of the Layered Editor.


Nib Width
Drag the Nib Width slider to set the diameter of the brush measured in pixels.
Feathering
Select the Nib Width button to reveal the Feathering slider. Drag the Feathering slider to set the blurring radius of the brush. Hold down Shift while using the mouse wheel to adjust the feather radius, represented by the dotted circle.
Spacing
Drag the Spacing slider to set how far apart each brush segment will be. This slider specifies the percentage of the size of the nib width, which determines how smooth or choppy the strokes will appear.
Use Auto Spacing: Select the Use Auto Spacing checkbox to allow Gemstone to choose a spacing percentage based on the nib width and feathering settings, which will create a smooth-looking stroke.
Fill
Select the Fill checkbox to fill the shapes you draw with the selected color.
Opacity
Drag the Opacity slider to specify the transparency of the brush strokes.
Blending
Select an option from the Blending drop-down menu to affect how your brush strokes blend with your image as you draw.
-
Drag over the image to draw.
Right-click a slider to reset to the default value.
Creating Straight Lines:
Hold the Shift key while using the Edit Brush to lock the direction the brush can move in horizontally, or vertically. For example, holding Shift, then clicking and dragging horizontally will lock the cursor into horizontal only so long as shift is being held. Release Shift to return to free hand brushing. You can even release Shift to return to free hand brushing, then press it again while still drawing the same line to unlock and re-lock the brush at will.
Creating Diagonal Lines:
Using the Edit Brush, Gemstone can create straight diagonal lines by placing two points on the image. Place the cursor where you want the line to begin, press and hold Shift, then Left-Click on the image to create a point. Let go of Shift, and move the brush to where the line will end, press and hold Shift, then Left-Click again to create a second point. A straight line will fill in between these two points.