Using ACDSee AI Super-Resolution
AI Super-Resolution enhances the quality of your images by using advanced algorithms to intelligently upscale lower-resolution photos. This feature increases the resolution and detail of your images, making them sharper and more defined without compromising quality. Whether you're enlarging a small photo or improving the clarity of a digital image, AI Super-Resolution helps you achieve professional results with ease.
DirectX 12 feature level 12_0 or higher is required for AI Features to run on your GPU. You can check your GPU's support level by running the dxdiag.exe tool and reviewing the Display tab or by looking up your device's official specifications. If your GPU doesn't meet the requirements, AI Features will still run using your CPU instead. A minimum of 4GB VRAM is required for GPU acceleration for AI Super-Resolution.
How AI Super-Resolution Works:
AI Super-Resolution enhances image quality by analyzing patterns, textures, and colors in the image. It then applies a complex algorithm to upscale the image, reducing noise and blurriness, removing artifacts, and adding pixels where necessary to maintain clarity and detail. This feature is especially useful for enlarging small images or zooming into cropped photos.
Examples of when to use AI Super-Resolution:
- Enlarging low-resolution images for large prints or displays
- Enhancing cropped images to improve their quality
- Increasing the size of older photos taken with lower-resolution cameras
How to apply AI Super-Resolution:
To enhance your images with AI Super-Resolution, perform the following:
- Open the image you would like to enhance in ACDSee RAW.
- Right-click on the image in the Filmstrip and select AI Super-Resolution.
If the Filmstrip is not currently visible, click on the up-facing Arrow button  , found in the bottom-left corner of the application.
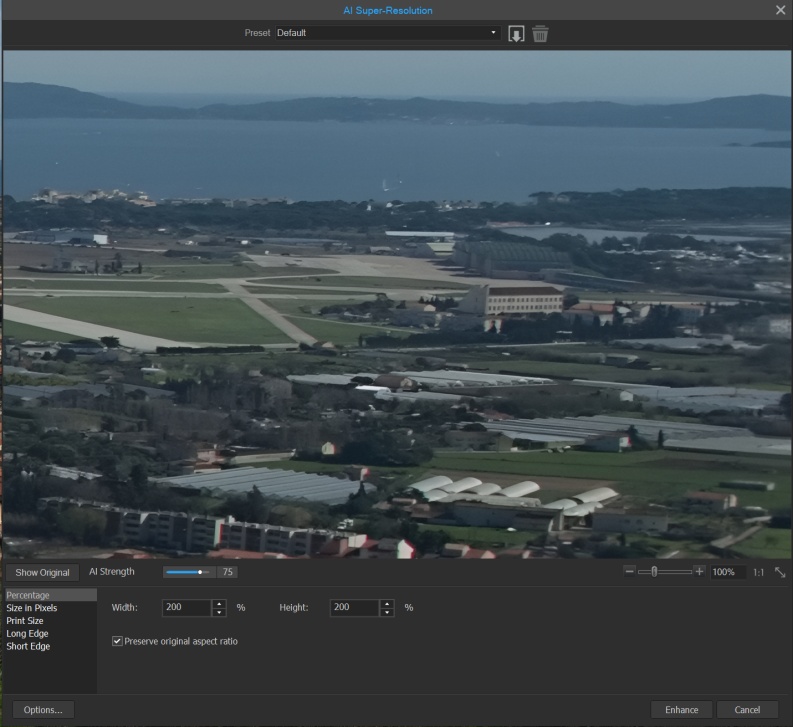
- In the AI Super-Resolution dialog, choose your preferred settings. The preview will automatically generate a new preview whenever parameters are changed so you can always see what it looks like in real-time.
- Click Enhance to apply Super Resolution to your image. The enhanced image will be saved by default into the same folder as the original. You can adjust this setting within Options at the bottom of the AI Super-Resolution dialog.
Once AI Super-Resolution has finished enhancing your image, it will appear in the Filmstrip.
Applying AI Super-Resolution to Multiple Images:
- Open the images you would like to enhance in ACDSee RAW.
- In the Filmstrip perform one of the following:
- To select specific images: Press and hold Ctrl and click on each image.
- To select a series of images: Click on an image and then press and hold Shift and click another image to select both images and all images in between.
- With images selected, right-click on one of them in the Filmstrip and select AI Super-Resolution.
If the Filmstrip is not currently visible, click on the up-facing Arrow button , found in the bottom-left corner of the application.
When selecting multiple images, only the first image will display in the preview window.
- In the AI Super-Resolution dialog, choose your preferred settings. The preview will automatically generate a new preview whenever parameters are changed so you can always see what it looks like in real-time.
- Click Enhance to apply Super Resolution to your image. The enhanced image will be saved by default into the same folder as the original. You can adjust this setting within Options at the bottom of the AI Super-Resolution dialog.
Once AI Super-Resolution has finished enhancing your images, they will appear in the Filmstrip.
Settings:
There are five option settings that are available no matter which measurement mode you use:
|
Show Original |
Shows the original image before any modifications for quick comparison. |
|
AI Strength |
Adjust the slider to increase or decrease the amount of influence the AI has in the enhancement. |
|
Zoom |
Adjust the zoom of the current preview display. |
|
Actual Size |
Sets the preview display to show the Actual Size of the image. |
|
Fit Image |
Sets the preview display to fit the image within the preview window. |
Resize Options:
There are five different resize options you can use to determine the size and quality of your image output.
|
Resize Method |
Setting |
Explanation |
|---|---|---|
|
Percentage |
||
|
|
Width |
Enter a new width for the images as a percentage of the original image. |
|
Height |
Enter a new height for the images as a percentage of the original image. |
|
|
Preserve original aspect ratio |
Check this box to keep the width-to-height ratio of the original images. |
|
|
Size in Pixels |
||
|
|
Width |
Enter a new width for the images in pixels. |
|
Height |
Enter a new height for the images in pixels. |
|
|
Preserve original aspect ratio |
Check this box to keep the width-to-height ratio of the original images. |
|
|
Fit within |
Specifies whether the aspect ratio is maintained based on the specified width. For more information about how the different combinations affect the images, see Resize, Rotate or Flip. |
|
|
Print Size |
||
|
|
Width |
Enter a new width for the images in pixels. |
|
Units |
Choose from inches, cm (centimeters), mm (millimeters), or pixels. |
|
|
Height |
Enter a new height for the images in pixels. |
|
|
Resolution |
Enter a resolution for the images in pixels per inch. |
|
|
Preserve original aspect ratio |
Check this box to keep the width-to-height ratio of the original images. |
|
|
Fit within |
Specifies whether the aspect ratio is maintained based on the specified width. For more information about how the different combinations affect the images, see Resize, Rotate or Flip. |
|
|
Long Edge |
||
|
|
Size |
Enter a size in units, and choose the units from the drop-down menu. There, you can choose from inches, cm (centimeters), mm (millimeters), or pixels. |
|
Resolution |
Enter a resolution for the images in pixels per inch. |
|
|
Short Edge |
||
|
|
Size |
Enter a size in units, and choose the units from the drop-down menu. There, you can choose from inches, cm (centimeters), mm (millimeters), or pixels. |
|
Resolution |
Enter a resolution for the images in pixels per inch. |
|