Recordings
LUXEA Free Video Recorder is used to record webcam, microphone, system audio, and screen. The recorded clips can then be added to a project's Timeline.
To Launch LUXEA Free Video Recorder from Within LUXEA Free Video Editor:
Perform one of the following:
- When on the Home Screen: Press New Recording.
- When in a Workspace: Click the Record button in the top left corner of the Media Panel.
- At any time, click File from the top menu and select Record | Record PC Screen...

To Launch LUXEA Free Video Recorder as a Standalone App:
To launch LUXEA Free Video Recorder as a standalone app, do the following:
- Click on the Windows Start menu button.
- Select the ACD Systems folder.
- Click on LUXEA Free Video Recorder to load the program.
When using the LUXEA Free Video Recorder as a standalone app, to have the LUXEA Video Editor automatically open after a recording, select Options ![]() from the Recorder main menu, and under the General tab, enable the Start LUXEA Free Video Editor after recording checkbox.
from the Recorder main menu, and under the General tab, enable the Start LUXEA Free Video Editor after recording checkbox.
When closing the recorder, you'll be given a dialog option to minimize to the system tray, or close the program.
Recorder Options
To Set the Recorder Window Options:
There are 3 ways to set the window dimensions.
- Enter the desired dimensions into the Height and Width fields, found to the right of the Monitor icon.
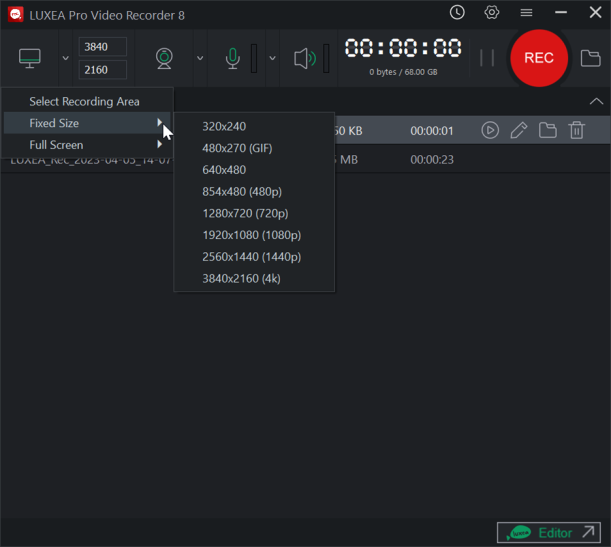
- Click the arrow in between the monitor icon and the dimension fields. From here there are three options: Select Recording Area, Fixed Size, and Full Screen.
- Select Recording Area dims the screen and produces a targeting reticule where the mouse cursor is. This will highlight anywhere from entire programs to select panels within the program. By clicking on a highlighted area, the recording area will set its parameters to encompass the area clicked. This is a great way to ensure you're recording a specific program or space on your screen.
- Fixed Size provides a list of the most common resolutions used by video. Use to quickly resize the recording area to a set resolution.
- Full Screen provides a list of the detected monitors connected to your system. Select a monitor to set the recording area to entire screen of that monitor.
To Record a Screen:
- Ensure the Screen on button
 displays a green line, and the dimension fields are not grayed out.
 - Configure the desired settings in the recorder window. See the Recording Options section below.
- In the top right corner, click the REC button
 , or press F9.
 - To stop recording, press F10. (To change this keyboard shortcut, see the Keyboard Shortcuts section in the Recording Options table below.)
The options during recording include:
- Toggle the Pause/Resume button to start and stop the recording.
Using the Recording Panel:
While recording, a small floating panel will appear in the bottom-right corner of your screen that displays your current recording time, as well as Pause/Play, Stop, Annotate, and Snapshot buttons. 
Taking a Snapshot While Recording:
This feature is not available in LUXEA Free Video Editor. Please Upgrade to LUXEA Pro Video Editor for access to this feature and much more.
While recording, you can take a Snapshot of your recording footage at any time by pressing the Snapshot button. 
- Ensure the Webcam is active with a green circle in the middle
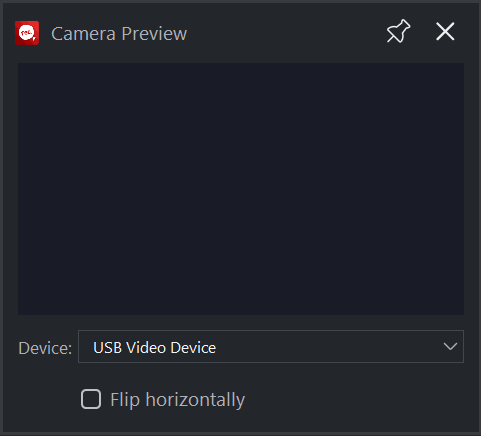
 . When turning on the Webcam, if one is connected, a preview window will display.
 - Select the device from the drop-down menu.
To disable webcam recording, click the Webcam icon to toggle it off and display a red \over the icon  .
.
Clicking the pin button in the top right will change it from unpinned  to pinned
  . While pinned, the Camera Preview will remain always on top of other programs. Click the pin button again to allow the window to be hidden again.
Flipping the Camera:
This feature is not available in LUXEA Free Video Editor. Please Upgrade to LUXEA Pro Video Editor for access to this feature and much more.
Click on the Flip Horizontally option at the bottom of the Camera Preview window to mirror the video.
To Record Using the Microphone:
- Ensure the Microphone icon
 displays a green microphone.
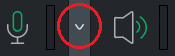
 - Click the down-arrow in between the Microphone and Speaker icons. Select the audio input device from the drop-down menu.
To disable a microphone recording, click the Microphone icon to toggle it off and display a red \ over the icon  .
.
To Record System Audio:
Ensure the System Audio icon ![]() is accompanied by a green soundwaves.
is accompanied by a green soundwaves.
When recording video or audio, LUXEA records in real-time MP4.
To disable system audio, toggle the Speaker icon to display a red line through it ![]() .
.
Setting the Auto Stop Options:
Auto Stop allows you to set parameters for a recording to automatically finish. To view options for Auto Stop, click the clock button to the left of the gear icon at the top.
You can set the video to stop after a specific recording time, or once the file reaches a certain size. Use the dropdown at the bottom of the dialog to set what the program does once it finishes recording. You can set it to Do nothing, Exit application, Shut down computer, or Put computer to sleep.
Once you're finished adjusting the settings, you can click the checkbox for Remember Auto Stop Settings to save the settings for future recordings.
Drawing Annotations While Recording
This feature is not available in LUXEA Free Video Editor. Please Upgrade to LUXEA Pro Video Editor for access to this feature and much more.
You can apply Annotations to your video by drawing with the Pen and Brush Annotation tools during recording. This feature is useful for highlighting items, sketching ideas, or emphasizing content in real time.
To Enable Annotations:
Click the Annotation icon in the recording popup  at the bottom-right corner of the screen. When active, the icon turns green and a tool tray appears on the right side of the screen.
Use the Draw tool for freehand drawing. Use the Shape tool to add straight lines, arrows, rectangles, circles, or diamonds. You can also customize the color and thickness of the lines.
To reposition the tool tray, click and drag the three-line menu at the top of the tray and drag.

While annotations are active, you cannot interact with other parts of the screen being recorded.
Overlays
There are three types of overlays that can be added to a recording:
- System Time Stamp
- Caption
- Watermark
See Recording Options below for more information.
To Add Overlays:
- In the Recorder dialog, select Options.
- Select one of the three following options:
- Add the date and time to a recording by selecting Options | System Time Stamp | Enable system time stamp.
- Add a caption to a recording by selecting Options | Caption | Enable caption.
- Add a watermark to a recording by selecting Options | Watermark | Enable watermark.
Video List
As recordings are created, a list of videos will appear below the Recording interface. You can Play, Edit, View in File Explorer, or Remove recordings.
To Play Recordings:
To play a recording, press the Play icon to the left of the recording, or right-click the recording and click Play to load the recording in your Default Video Player.
To Edit Recordings:
To edit a recording, press the Pencil icon on the right of the recording in the Video List, or right-click the recording and select Edit to load the recording up in LUXEA Free Video Editor ready to be edited.
To View Recording Files in File Explorer:
To view a recording file in File Explorer, press the folder icon on the right of the recording in the Video List, or right-click the recording and select View in Explorer to load up the file location in a File Explorer window.
To Remove Videos:
To remove a recording, press the trash can icon on the right of the recording in the Video List, or right-click the recording and select Remove to delete the recording.
This will display a confirmation dialog. To delete the recording from your hard drive entirely, select Delete from disk before clicking Yes.
Returning to LUXEA Free Video Editor:
Click the LUXEA Editor button in the bottom right to load up LUXEA Free Video Editor and take you to the Home Screen.
Recording Options
To set the recording options, go to Options.... In the Options dialog, configure the settings as described below.
|
General |
||
|
|
Disable Screensaver During Recording |
Disables the screensaver while the program is recording to prevent the screensaver from appearing and overlapping the recording instead. |
|
|
Start LUXEA Free Video Editor after recording |
When using the LUXEA Free Video Recorder as a standalone app, enable the Start LUXEA Free Video Editor after recording checkbox to have LUXEA Free Video Editor automatically open after ending the recording session. |
|
Video |
||
|
|
Quality |
Select between "Best", "Better", and "Normal" to determine a resource-appropriate video quality setting for Screen Recordings. |
|
|
Frame Rate |
Select the screen record frame rate to determine how quickly the picture refreshes. While it is possible to limit the frame rate during capture, a higher quality cannot be achieved by setting the frame rate above the recording computer's capabilities. |
|
Output Settings |
||
|
|
Recorded Files |
Either manually enter the direcotry, or click the "..." button to select a directory. |
|
|
File Naming Settings |
Enter a text string portion of the file name to be combined with the value selected from the drop-down list. The file name used to save output from LUXEA Free Video Editor is the combination of the text string and the value selected in the drop-down list. |
|
Mouse |
||
|
|
Play mouse click sounds |
Left click: Enable to play a mouse-click sound for each left-click mouse event. Right click: Enable to play a mouse-click sound for each right-click mouse event. |
|
Mouse highlight |
Enable to create a highlighted effect around the mouse cursor to draw attention to it. |
|
|
Size |
The slider determines the Size of the mouse highlight. |
|
|
Color |
The Color Picker allows you to determine the color of the mouse highlight. |
|
|
Add mouse click effect |
Enable to add an effect on screen when clicking a mouse key. |
|
|
Type |
Lets you set the type between a border ring surrounding the cursor, or a filled in highlighted circle behind the cursor. |
|
|
Size |
The slider determines the size of the mouse highlight. |
|
|
Left click color |
Use the color picker to determine the color when left-clicking. |
|
|
Right click color |
Use the color picker to determine the color when right-clicking. |
|
|
Mouse trail |
Enable to add a trail effect to the mouse cursor while it moves. When enabled, the trail is not visible to you, but is visible in recorded footage and streams. |
|
|
Color |
Use the color picker to determine the color of the mouse trail. |
|
|
Size |
Use the slider to determine the size of the trail that follows the cursor. |
|
|
Decay time |
Use the slider to determine the rate at which the trail disappears, ranging from 100ms to 800ms. |
|
|
Keyboard Shortcuts |
||
|
|
Start/Resume/Pause (F9) |
Click into the field and press any key to set it as the shortcut for Start/Resume/Pause. |
|
|
Stop (F10) |
Click into the field and press any key to set it as the shortcut for Stop. |
|
|
Snapshot (F11) |
Click into the field and press any key to set it as the shortcut for saving a Snapshot. |
|
Performance |
||
|
|
Enable hardware acceleration |
Enabled by default, the Hardware Acceleration option ensures that the encoding process is undertaken by the graphics card, rather than the CPU. Hardware Acceleration quickens the media rendering process. If presented with multiple graphics cards, LUXEA Free Video Editor will prioritize hardware acceleration options using the following hierarchy: NVIDIA, Intel® Quick Sync. |
|
System Time Stamp |
||
|
|
Enable system time stamp |
Enable to add a time system time stamp to the recording. |
|
|
Text |
Click the Font button to configure the font, size, style, and color. |
|
|
Background |
Click the Background Color Picker to choose the background color to appear behind the date and time. For no background, click the eye icon on the right side so it has a line diagonally through it to make the background transparent. |
|
|
Position |
Select a square to indicate where on the screen the date and time will appear. |
|
Caption |
||
|
|
Enable caption |
Enable to add a caption to your recording. |
|
|
Title |
Enter text to be displayed as a caption. |
|
|
Text |
Click the Font button to change the text Font style. |
|
|
Background |
Click on the Background Color Picker to set the background color. The eye icon indicates that the background is visible, the eye icon with a line struck through it indicates that the background is disabled. |
|
|
Position |
Select a square to indicate where on the screen the caption will appear. |
|
Watermark |
||
|
|
Enable watermark |
Enable to add a watermark to your recording. |
|
|
Position |
Select a square to indicate where on the screen the watermark should appear. |
|
|
Opacity |
Use the slider to determine the opacity level of the watermark in the recording. |
|
Webcam |
||
|
|
Position |
Select a square to indicate where on the screen the webcam will be displayed. |
|
|
Size |
Use the slider to determine the sizing of the webcam display on the screen. |