You are here: Correcting Flaws with Photo Editor > Removing Flaws > Removing Flaws Using the Rubber Stamp Tool

Removing Flaws Using the Rubber Stamp Tool

You can use the Rubber Stamp Tool to erase large flaws in your photos.

To Remove Flaws from a Photo:

  1. Select the Magnifying Glass Tool and click to zoom in on the flaw.
  2. In the Fix section of the Toolbar, select the Rubber Stamp Tool from the drop-down menu.
  3. Press and hold the Alt key then click in an area of the photo containing pixels that you would like to copy and paste over the flaw. This is the reference point.
  4. In the Properties bar, set the options as described below.
  5. Click and drag across the flaw in the photo. You will see a (+) symbol. This is the reference point. As you click and drag, the (+) also moves. The pixels underneath the (+) are copied and pasted over the flaw.
  6. Click Done.

Rubber Stamp Tool Options

Stamp Style

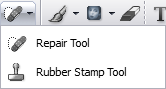
Select a Stamp Style:

  • If you select Clone (Aligned), the tool remembers the distance and angle between the reference point and the next point that you click. You can click anywhere in the photo and the reference point follows your cursor at the original distance and angle. This means that whenever you click, you establish a new reference point.
  • If you select Clone (Non-Aligned), the tool temporarily remembers the distance and angle between the reference point and the next point that you click. Every time you click in the photo, the distance and angle from the original reference point to the new point is reset, and the reference point follows your cursor at the new distance and angle. This means that you always use the same reference point.
  • Select Impressionist to smudge pixels to hide the flaw. If you choose Impressionist, you do not have to set a reference point.

Brush options drop-down menu

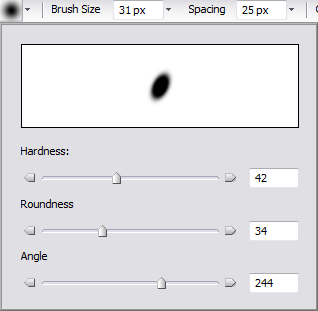
Select Brush Options:

  • Drag the Hardness slider to the left to soften the brush or nib and to the right to harden.
  • Drag the Roundness slider to the left to flatten the brush or nib and to the right to make the brush or nib round.
  • If you flattened the brush or nib, you can drag the Angle slider to the left and right to change the angle of the brush or nib.

Brush Size

Click the drop-down arrow beside the Brush Size box and drag the slider to the left or right until the brush or nib is the desired size.

Spacing

Click the drop-down arrow beside the Spacing box and drag the slider to the left to create a smooth, continuous stroke and to the right to create a dotted stroke.

Opacity

Click the drop-down arrow beside the Opacity box and drag the slider to the left to reduce opacity and to the right to increase opacity.

Mode

Choose a Mode setting to determine how the brush will interact with the image.

Fade drop-down menu

Select Fade:

  1. Select Size to create the impression that a stroke is shrinking, as if you are slowly lifting the brush or nib off the work area.
  1. Select Opacity to create the impression that a stroke is fading, as if the brush or nib is slowly running out of ink.
  1. Select Size and Opacity to create the impression that a stroke is shrinking and fading.

Within

Specifies the percentage of how fast the brush will fade.

See Also: