Creating a Panorama with Panoramic Stitching
You can use panoramic-stitching to combine a series of side-by-side images. By combining multiple side-by-side images, you can create a new single image.
To Create a Panoramic Image:
- Select the images in the File List pane.
- Do one of the following:
- Choose Process | Panorama...
- Press Ctrl + Alt + P.
- Right-click your selection and choose Process | Panorama... from the context menu.
- Choose Process | Photomerge | Panorama... from the right side options.
- Press Ctrl + Alt + M | Panorama... from the right side options.
- Auto-Crop: Automatically crops the edges of the image to create a smooth rectangle
- Remove vignette from source images: Cleans up the seams between images by removing vignetting.
- Use the arrow buttons to the right side to rotate your images clockwise or counterclockwise.
- Hit Merge to generate the panorama outputs.
Your selected images must have the same dimensions.
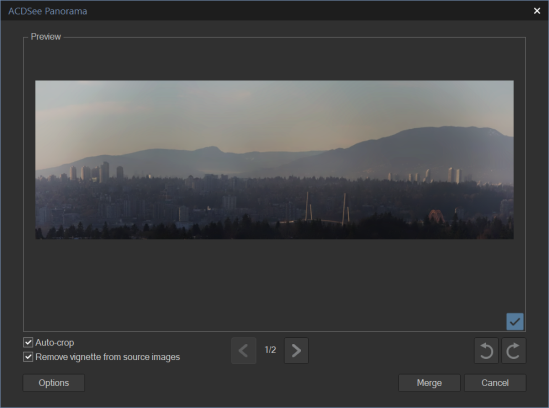
Once the Panorama preview image is generated, you can apply Auto-Crop or Remove Vignette:
This may remove significant portions of the edges
More than one panorama image can be created at a time. To include the panorama in your output be sure to click the checkbox in the bottom right corner of the preview.
The maximum pixel dimensions for generated Panorama images is 16000 x 16000.
The Panorama command will ignore all masks, text layers, and adjustment layers.
Running Panoramic Stitching on large images will require a significant amount of memory.
There is a 50 image limit when performing Panoramic Stitching.