Using Presets in Develop Mode
You can save your develop settings as a preset to apply the same adjustments to additional images. Presets allow you to quickly apply changes to an image without having to repeat the steps each time you want to apply the same change. For example, if you always correct your images using the Contrast tool with the value of 25 and the Midtones tool with the value of -8, you can save these settings as a preset and quickly apply them to change the contrast and midtones in your images.
You can also use presets to ensure that settings are applied consistently in your images. You can create a preset with one or multiple develop settings. You can opt to save presets from all Develop settings across the Tune, Detail, Geometry, and Repair tabs. Or you can save presets from the settings from all of the groups within a single tab, such as all of the settings on the Tune tab. Or you can save presets by individual group only, such as the Color EQ group.
To make your experience with Develop mode presets easier, you can now utilize the Develops Preset pane to create, delete, manage, and categorize your global presets.
You can apply as many presets as you want to an image. Each time you add a preset, the settings are applied on top of the previous settings.
Using the Develop Presets Pane
To Create a Preset using the Develop Presets Pane:
- In Develop mode, select the Tune, Detail, Geometry, or Repair tab.
- Select a group and make corrections to your image.
- In the Develop Presets pane, do one of the following:
- Right-click in the Develop presets pane and select Create Preset.
- Select the Create new Preset button in the Develop Presets pane.

- In the Save Develop Settings Presets dialog, select the settings you want to save to the preset and enter a name for your preset.
- Click OK.
To Rename a Preset using the Develop Presets Pane:
- In the Develop Presets pane, right-click on the preset you want to rename, and select Rename Preset.
- Enter a new name for your preset and click OK.
To Delete a Preset using the Develop Presets Pane:
- To delete a preset do one of the following:
- In the Develop Presets pane, right-click on the preset you want to delete, and select Delete Preset.
- Press the trash icon in line with the preset you want to delete.
- In the Delete Preset dialog, press Yes to confirm.
To Apply a Preset to an Image Using the Develop Presets Pane:
With an image open in Develop mode, click on any preset in the Develop Presets list.
The image is updated with the selected preset.
To Import Presets Using the Develop Presets Pane:
- In the Develop Presets pane, select the Import Presets button.
- Choose the files to import and select Open.
To Export Presets Using the Develop Presets Pane:
- In the Develop Presets pane, select the Export Presets button.
- In the Export Presets dialog, choose which Develop presets to export.
- Select Export.
- In the Save As dialog, choose a name for your presets and select Save.
Using Categories in the Develop Presets Pane
Categories in the Develop Presets pane allow you to organize and manage your presets. When you first open ACDSee Professional, you will see a series of organized default categories containing default presets.
To Create a Category for Your Develop Presets:
- Right-click in the Develop Presets pane and select New Category.
- In the Add a new Category dialog, enter a Category name and press OK.
To Delete a Category:
Right-click in the Develop Presets pane and select Delete Category.
To Add a Preset to a Category:
In the Develop Presets pane, right-click on your chosen preset and select Set Category then choose from your categories. Your preset will be added to the chosen category.
To Remove a Preset from a Category:
In the chosen category, right-click on your chosen preset and select Set Category then click on the relevant category. Your preset will be removed from your chosen category.
Other Ways to Create and Apply Presets
You can also create and access presets by clicking the develop settings button  from the following places:
|
Top of the pane
|
Use the develop settings button from the top-level to save all develop settings from Tune, Detail, Geometry, and Repair tabs. Presets created at this level can be accessed from Manage and View mode. In Manage mode, presets can be applied to multiple images at a time.
|
|
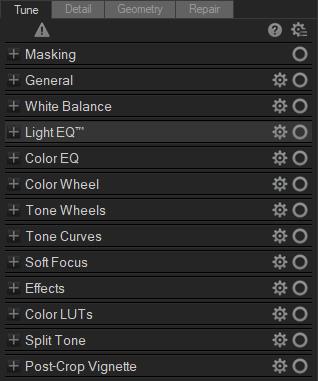
Tabs: Tune, Detail, Geometry, or Repair
|
Use the Develop Settings button within a tab to save develop settings exclusively from the groups within that tab only. The example on the left shows the settings button to click to save develop settings from the Tune tab. A preset created in a tab can only be accessed through the same tab.
|
|
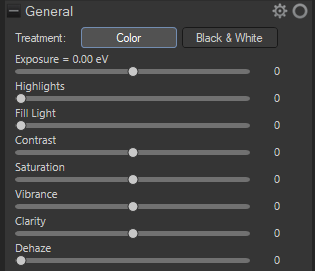
Groups
|
Use the Develop Settings button within a group to save develop settings exclusively from within that group only. The example on the left shows the settings button to click to save develop settings from the General group. A preset created in a group can only be accessed through the same group. |

To Create a Preset from the Top of the Pane:
- Make corrections to your image in Develop mode.
- Click the develop settings button located at the top of the pane.
- Select Save Preset from the menu.
- In the Save Develop Settings Presets dialog, click Select All to save your settings, or select only the specific settings you want to save as a preset.
- Enter a name for your preset.
- Click OK.
To Create a Preset from a Tab:
- In Develop mode, select the Tune, Detail, Geometry, or Repair tab.
- Make corrections to your image in the tab.
- Click the develop settings button on the top right of the tab.
- Select Save Preset from the menu.
- In the Save Develop Settings Presets dialog, enter a name for your preset.
- Click OK.
To Create a Preset from a Group:
- In Develop mode, select the Tune, Detail, Geometry, or Repair tab.
- Select a group and make corrections to your image.
- Click the develop settings button located on the top right of the group.
- Select Save Preset from the menu.
- In the Save Develop Settings Presets dialog, enter a name for your preset.
- Click OK.
Applying a Preset to a Single Image
To Apply a Preset to a Single Image in Develop Mode:
- Click a develop setting button from the top of the pane, tab, or group.
- From the menu, select a preset.
The image is updated with the selected preset.
You can also apply presets to an image in the Filmstrip. Select an image in the Filmstrip, right-click and select Apply Preset. Then select the preset you want to apply to the image. The image is updated with the selected preset.
To Apply a Preset to a Single Image in View Mode:
- In Manage mode, select an image and click the View tab.
- Right-click on the image and select Process | Apply Preset.
- Select the preset you want to apply to the image.
The image opens in View mode.
The image is updated with the selected preset.
Applying a Develop Settings Preset to a Batch of Images
Applying a preset to multiple images helps to save time, and improve the efficiency of your workflow.
To Apply a Preset to a Batch of Images:
- In Manage mode, select the images that you want to apply a preset.
- Click Process | Apply preset and then select a preset.
The thumbnail images are updated to reflect the preset applied.
To apply a preset to a batch of images and export them to other formats see Using Batch Develop.
Renaming Presets
You can rename a preset at any time.
To Rename a Preset:
- Click the develop settings button.
- Select Manage Presets.
- In the Manage Presets dialog, select a preset and click Rename.
- Enter a new name for the preset.
- Click OK to save and close the dialog.
Deleting Presets
You can delete presets that you no longer need. Deleting a preset does not affect images that already have the preset applied.
To Delete a Preset:
- Click the develop settings button.
- Select Manage Presets.
- In the Manage Presets dialog, select a preset and click Delete.
- Click OK to save and close the dialog. Or click Cancel to cancel deleting your preset.
Importing and Exporting Presets
You can share your presets with other users by exporting them. You can also import presets made by other users, or from your old computer.
To Export Presets:
- Create presets as described above. (To create presets in Edit mode, see Using Presets in Edit.)
- Choose Tools | Export Presets.
- In the Export Presets dialog, click the plus + signs to expand the tree, and check/uncheck the checkboxes to select which presets to export. You can export global, tab, or group presets.
- To export Edit mode filters at the same time, check the Include Edit mode filter presets checkbox.
- Click Export.
- In the Save As dialog, browse to specify the destination for your exported presets.
- Enter a name in the field, and press Save.
You can choose to export only specific presets under the branches by checking/unchecking the checkboxes. A gray checkbox indicates that some presets under the branches are selected, but not all.
To Import Presets:
- Choose Tools | Import Presets.
- In the Open dialog, navigate to the location of your presets.
- Select the presets for import and press Open.
- In the Import Presets dialog, click the plus + signs to expand the tree, and check/uncheck the checkboxes to select which presets to import. You can import global, tab, or group presets.
- Press Import. Find your imported presets in the presets menus in their respective groups.
You can choose to import only specific presets under the branches by checking/unchecking the checkboxes. A gray checkbox indicates that some presets under the branches are selected, but not all.