|
Tool |
Instructions |
|||||||

|
Hand |
Use the Hand tool to exit out of any other drawing or selection tool. If you have a scrollable image, the Hand tool also allows you to pan it. |
||||||

|
Move |
Use the Move tool to move image and text layers, and selections, as well as to rotate and resize layers. You can also move and rotate objects, such as circles, lines, etc, that you have created on their own respective layer. (See To Add a Layer.) Select the Move tool, then click and drag the layer. If moving an object on its own respective layer, select the layer, then click the object on the image and drag it to your desired location. You can use the Arrow keys to move layers pixel by pixel. Use the Snap to buttons in the Context bar to snap the image, text, or object to the left, right, top, bottom, center, and respective corners. You can also enable the Show Grid button in the Context bar to display a grid over your image. This is useful when making precise placements. To ensure that your layer's aspect ratio is maintained while resizing, click the Lock Aspect Ratio checkbox in the Context bar and drag from the corners of your layer. The Lock Aspect Ratio checkbox is enabled by default. To rotate images, text, or objects, hover your cursor over the rotation handle at the center of the image, text, or object until your cursor becomes a circular arrow. You can then drag your cursor clockwise or counterclockwise. You can also lock your rotation to each 45° angle by holding down the Shift key while rotating. You can use the Move tool to move Guidelines. See Adding Rulers and Guidelines. To commit your move, press the Commit button in the Context bar. To discard your move and revert back to your image's original position, press the Discard button. You can move a layer outside of the image area, commit it, then press the Move tool button again and move it back into the image area without a loss of image data. You can even retrieve your moved layer after saving your file as a .acdc, closing it, and re-opening it at a later date. However, there are some adjustments that will trigger the loss of image data if applied to the moved layer. These adjustments are called destructive operations. The following are destructive operations:
Recording a non-destructive operation and playing it back will result in a destructive operation. We recommend applying destructive operations to the layer you want to move prior to moving it. The following are non-destructive operations that will not trigger the loss of image data if applied to the moved layer: If you do not have enough space on your hard drive, even non-destructive operations will become destructive.
|
||||||

|
You can use the Resize Canvas tool to expand the size of your canvas to fit layered content or add solid backgrounds. You can resize the canvas in the following ways:
In the Context bar, you can:
Resize your canvas as desired, then press the Commit button in the Context bar. When you resize the canvas on an image with multiple layers, the resizing is performed on the selected layer. You can use the Arrow keys to resize the canvas pixel by pixel. |
|||||||

|
Text |
|||||||

|
Rectangle |
Drag over the image to create rectangle. Press Shift as you draw to create a square. To fill your shape with color, ensure that the Fill checkbox is selected. |
||||||

|
Ellipse |
Drag over the image to create an ellipse. Press Shift as you draw to create a circle. To fill your shape with color, ensure that the Fill checkbox is selected. |
||||||

|
Line |
Drag over the image to draw a straight line. Press Shift as you draw to create a vertical or horizontal line. |
||||||
|
|
Arrow |
Drag over the image to create an arrow. Press Shift as you draw to create a vertical or horizontal arrow. |
||||||

|
Polygon |
Click to set the corner points of a polygon, then double-click to connect the start and end points to complete the polygon. To fill your shape with color, ensure that the Fill checkbox is selected. |
||||||

|
Curve |
Drag over the image then release. Next, move your mouse to create the curve and click to set. |
||||||

|
Brush |
Drag over the image to draw a free-flowing line. Left-click with your mouse to draw with the foreground color, and right-click to draw with the background color. Use the mouse wheel to adjust nib width or use the Nib Width slider at the top of the panel, near the Opacity slider. Use Shift + mouse wheel to adjust the amount of feathering or adjust the Feathering slider at the top of the panel, near the Opacity slider. You can undo and redo each brush stroke individually using the Undo and Redo buttons at the bottom of the Filter Menu. |
||||||

|
Fill |
Select the Fill button, and click on a pixel to shade every pixel of that same color value with your selected color. Your selected color is defined in the color box, as described below. Use the Threshold slider to adjust the number of pixels to be included or excluded. The Threshold slider sets how similar a pixel needs to be to the one you clicked in order to be included in the selection. Enable the Connected checkbox in the Context Bar to fill all of the connected pixels of the same color. |
||||||

|
Gradient |
Use the Gradient tool to draw gradients across your image, or use the radial option to draw a gradient around an area. Select the Gradient tool, then configure your color, opacity and blend mode using the Context bar. For a radial gradient, select the Radial Gradient button in the Context bar. Then draw your gradient by dragging across the image. To discard your gradient, press the Discard button in the Context bar. Rearrange your gradient as desired, then press the Commit button in the Context bar. You can undo your commit by pressing Ctrl + Z |
||||||

|
Eraser |
Use the Eraser tool to erase pixels. To erase pixels on a layer to reveal the layer beneath, select the second layer or higher in the Layered Editor and drag your cursor over the pixels you would like to erase on the image. This tool modifies the alpha channel value of the pixels. |
||||||
|
|
Eye Dropper |
Use the Eye Dropper tool to select colors from your images. Click a color in the image, which will appear in the color boxes at the top right of the panel. You can then apply this color using the drawing tools, such as the Brush tool. You can select the background color (bottom of the color boxes) by right-clicking on your image. You can select a color from outside of the application by left-clicking on your image and dragging your cursor to the color outside of the application. When you release your mouse button, the color will be selected and shown in the color boxes at the top right of the panel. |


Select from one or more of the following options (Note: options vary depending on the tool selected):
|
Option |
Instructions |
|

|
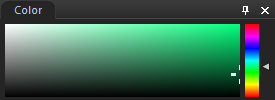
Color |
Select a color by clicking the color boxes at the top right of the panel to open the Foreground or Background Color dialog, which displays a dialog of swatches to choose from. If you are drawing a solid shape, such as a rectangle, the top (foreground) color box defines the color for the outline of the shape. The bottom (background) color box defines the color that fills the center of the shape. If you want your shape to be a solid color, set both color boxes to match. You can reset to black and white by pressing the reset button directly next to the color boxes. You can also access the color palette on the fly by using the Color pane at the top of the Layered Editor.
|

|
Nib Width |
Drag the Nib Width slider to set the diameter of the brush measured in pixels. You can also adjust the nib width with the mouse wheel or by right-clicking on the image to reveal the Nib Width sliders. |
|
Feathering |
Select the Nib Width button to reveal the Feathering slider. Drag the Feathering slider to set the blurring radius of the brush. You can also right-click on the image to reveal the Nib Width and Feathering slider. Or, you can also hold down Shift while using the mouse wheel to adjust the feather radius, represented by the dotted circle. |
|
|
Spacing |
Drag the Spacing slider to set how far apart each brush segment will be. This slider specifies the percentage of the size of the nib width, which determines how smooth or choppy the strokes will appear. Use Auto Spacing: Select the Use Auto Spacing checkbox to allow ACDSee to choose a spacing percentage based on the nib width and feathering settings, which will create a smooth-looking stroke. |
|
|
Fill |
Select the Fill checkbox to fill the shapes you draw with the selected color. |
|
|
Opacity |
Drag the Opacity slider to specify the transparency of the brush strokes. |
|
|
Blending |
Select an option from the Blending drop-down menu to affect how your brush strokes blend with your image as you draw. |