Exporting for Other Devices
The Device tab in the Export tool is used to craft media assets destined to be output and stored on external devices.
The Device tab is divided into two sections: the left-hand "Device Type" section and the right-hand "Options" section.
Device Type Section
The Device tab's Device Type section contains 11 output types for selection:
- Android
- Apple TV
- Apple TV 4k
- Google Pixel
- iPad
- iPhone
- Nintendo Switch
- Playstation
- Samsung Galaxy
- Smart TV
- Xbox
Options Section
The right-hand Options section is used to customize a project's output for each output type.
To produce with settings optimized for a specific device:
- Add media assets added to the Timeline.
- Click the Export button located in the upper right-hand corner of the LUXEA Pro 7 interface.
- In the Export tool dialog, select a tab in the Device Type section.
- In the Options section, enter a project name.
- Use the default value for the Save To field, or click the adjacent file folder icon to select a new location.
- Make a selection from the Template drop-down list. To add custom templates, see Custom Templates.
- Accept the default values for the Resolution field and Frame Rate field, or if selecting "Custom" from the Template drop-down list, click the adjacent Settings button to set new size and rate parameters. For more information on the Settings button, see Setting Custom Values.
Note that the Estimated Size field value is calculated by the values selected in the Settings dialog.
- Click the Export button to complete the project.
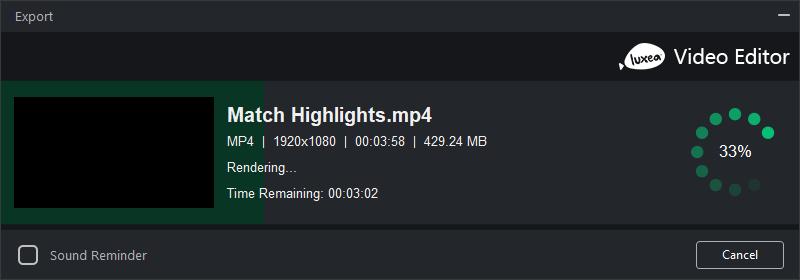
The Export dialog features a progress preview of the project and a Sound Reminder checkbox for sounding a reminder when rendering completes.
Custom Templates
To add custom templates:
- With the Export tool open, navigate to the Options section and click the Manage button adjacent to the Template field.
The Format field is auto-populated based on the selection made in the Output Type section.
- In the Template Manager dialog's Video heading, make selections for the Encoder, Resolution, Frame Rate, and Bitrate drop-down lists.
- In the Audio field set, make selections for the Encoder, Channel, Sample Rate, and Bitrate drop-down lists.
- Click the Save As... button to enter a template name and exit the Template Manager dialog. Click the Save button to overwrite the current template.
Note that in the Export tool, saved templates from either the Template Manager or Settings dialogs appear in the Template field's drop-down list.
Setting Custom Export Values
To change the output file settings:
- Open the Export tool.
- Click the Settings button adjacent to the Resolution field.
- In the resultant Settings dialog, enable one of the Normal, Better, or Best radio buttons.
- Under the Video heading, make selections for the Encoder, Resolution, Frame Rate, and Bitrate drop-down lists.
- Under the Audio heading, make selections for the Encoder, Channel, Sample Rate, and Bitrate drop-down lists.
- Click the Save As Template button to produce the New Template dialog.
- Enter a name for the template and click the OK button.
Video Parameters Options
| Field | Description |
|---|---|
| Encoder | Specifies the video data compression type. |
| Resolution | By default, the resolution will reflect the current settings of the Display Area Dimensions. To change the resolution, select a resolution from the drop-down, or select "Custom" from the drop-down list and specify new dimensions in the adjacent Width and Height fields. |
| Frame Rate | Determines the frequency of picture refreshes. |
| Bitrate | Select the bitrate to determine how much data will go to the screen per second of playback. A higher bitrate allows for a higher quality picture, however, it also increases the file size. |
Audio Parameters Options
| Field | Description |
|---|---|
|
Encoder |
Specifies the audio data compression type. |
|
Channel |
From the drop-down menu, select "Mono" to have the same sound produced from the left and right speakers, or, select "Stereo" to produce different sounds from the left and right speakers. |
|
Sample Rate |
Sampling describes the data rate of a sound recording. A higher sample rate allows for higher quality sound, however, it also increases the file size. |
|
Bitrate |
Determines how much audio data will go to the speakers per second of playback. A higher bitrate allows for a higher quality sound, however, it also increases the file size. |