Adding Text to Media
Adding text to a project is useful for providing additional information to viewers, such as introducing new scenes. A variety of text effects make projects more compelling, such as Transitions, Animations, Behaviors, Filters, Chroma Key, Color LUT and/or Color Pass. A popular transition is to allow text to fade in and out, from clip to clip (see "Fading text in and out").
To add text to images or videos:
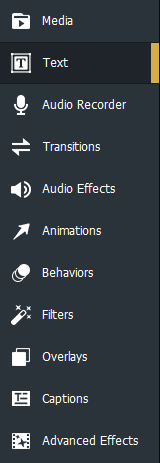
- Select the Text tab, or press T to see a list of Text Styles.
- Do one of the following:
- Select a Text Style and drag it to the desired location on the Timeline.
- Right-click a Text Style and select Apply, or press Alt + A.
- A text box will open beneath the Display Area to edit the text displayed and its styles. On the right hand side, change the font, color, size, style, Text Effects, direction, and alignment.
Within the Display Area, use the mouse to adjust the size and orientation of the Text.
Creating Custom Text Styles
Customize and save Text Styles as presets for future use.
To create a custom text preset:
- In the text settings, click the Save as Custom button.
- In the New Preset dialog, enter a name for the text preset.
- Click OK.
To delete a custom text preset:
Right-click the custom text preset in the Text tab and click Delete.
To delete text:
Right-click the text on the Timeline and select Delete.
Text Effects
Effects can be added to text.
- In the text settings, click the fx button.
- In the Text Effects dialog, enable the desired checkboxes.
- Configure the settings as described in the Text Effects options table below.
- Click OK.
Batch Text Edit
Edit multiple pieces of media text at one time.
To use Batch Edit Text:
- Select multiple pieces of Text on the Timeline by using Ctrl + Click or by clicking and dragging a box around the media assets.
- Right-click and select Batch Edit Text...
- In the Batch Edit Text dialog, select the relevant edits you wish to apply to all selected text. In the General tab, edit fonts, color, size, style, direction, alignment and position. For advanced options, use the Text Effects options table below as a guide.
Text Effects Options
| Inner Glow | |
|
Blend Mode |
Specifies how the effect blends with the text. Select a blend mode from the drop-down menu. |
|
Color |
Specifies the color of the glow. Click the color picker to select a different color. |
|
Thickness |
Specifies the thickness of the glow effect. Drag the slider to set the thickness. |
|
Blur |
Blurs the edges of the glow. Drag the slider to determine how much blur is applied. |
|
Opacity |
Specifies the opacity of the glow. Drag the slider to adjust the opacity of the glow. The higher the opacity, the more visible the glow is. |
| Inner Shadow | |
|
Blend Mode |
Specifies how the effect blends with the text. Select a blend mode from the drop-down menu. |
|
Color |
Specifies the color of the shadow. Click the color picker to select a different color. |
|
Rotation |
Specifies the angle of the shadow. Type a number from 0 to 359.9 or drag the arrow to adjust the angle. |
|
Blur |
Blurs the edges of the shadow. Drag the slider to determine how much blur is applied. |
|
Distance |
Specifies the size of the shadow according to the rotation setting. Drag the slider to adjust how far the shadow encroaches on your text. |
|
Opacity |
Specifies the opacity of the shadow. Drag the slider to adjust the opacity of the shadow. The higher the opacity, the more visible the shadow is. |
| Bevel | |
|
Elevation |
Specifies the visibility of the bevel effect. As you reduce the Elevation slider, the text darkens, making the effect stand out more. |
|
Radius |
Specifies how spread out the bevel is. |
|
Light Source |
Specifies an imaginary light source. Click and drag the glow on the ball to reposition the imaginary light source. |
| Outline | |
|
Color |
Specifies the color of the outline. Click the color picker to select a different color. |
|
Thickness |
Specifies the thickness of the outline effect. Drag the slider to set the thickness. |
|
Blur |
Blurs the edges of the outline. Drag the slider to determine how much blur is applied. |
|
Opacity |
Specifies the opacity of the outline. Drag the slider to adjust the opacity of the outline. The higher the opacity, the more visible the outline is. |
| Blur | |
|
Strength |
Specifies the strength of the blur. Move the slider to the right to intensify the effect. |
| Shadow | |
|
Color |
Specifies the color of the shadow. Click the color picker to select a different color. |
|
Rotation |
Specifies the angle of the shadow. Type a number from 0 to 359.9 or drag the arrow to adjust the angle. |
|
Blur |
Blurs the edges of the shadow. Drag the slider to determine how much blur is applied. |
|
Distance |
Specifies the size of the shadow according to the rotation setting. Drag the slider to adjust how far the shadow encroaches on your text. |
|
Opacity |
Specifies the opacity of the shadow. Drag the slider to adjust the opacity of the shadow. The higher the opacity, the more visible the shadow is. |
Fading Text In and Out
Text can be set to fade in and out with clips by adding transitions to the text.
To add fading transitions to text:
- With a clip added to the Timeline, select the Text tab, or press T to see a list of Text Styles.
- Select the Text Style you would like to use and drag it to your desired location on the Timeline. You can also right-click on the Text Style you would like to use and select Apply or press Alt + A.
- Select the Transitions tab or press S.
- Select either Fade, Fade to Black or Fade to White transition, and drag it on to the text on your Timeline so it lines up with the start and end of the text.